Building a Meshtastic node: My Journey
In today’s interconnected world, where reliance on internet and mobile networks is almost ubiquitous, I embarked on an exciting project to build my own LoRaWAN masternode. This endeavor was driven by two main motivations: exploring this innovative technology and creating an alternative communication system that doesn’t depend on traditional infrastructure. In this blog post, I’ll walk you through the process, challenges, and lessons learned during this journey.
Introduction
"Meshtastic® is a project that enables you to use inexpensive LoRa radios as a long range off-grid communication platform in areas without existing or reliable communications infrastructure. This project is 100% community driven and open source!"
Choosing the Components
-
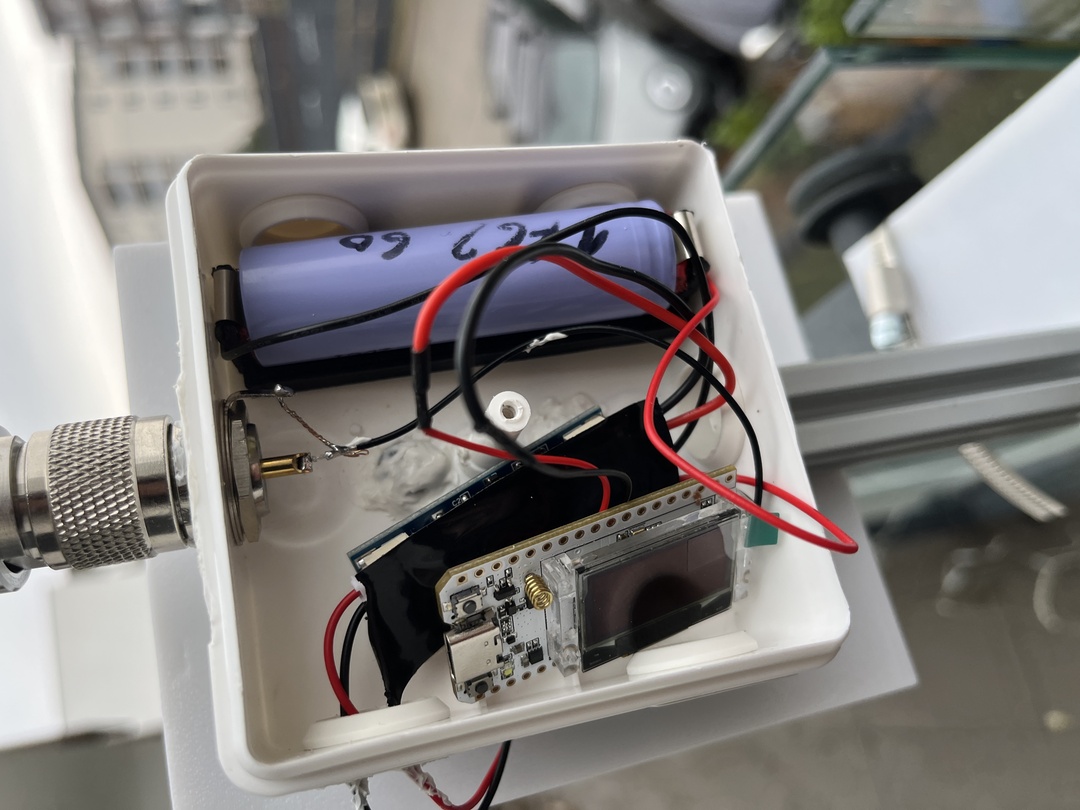
Haltek v3 Board: At the heart of my project is the Haltek v3 board, chosen for its compatibility with LoRa technology and robust features suited for outdoor use. It serves as the base station, handling all communication tasks efficiently.
-
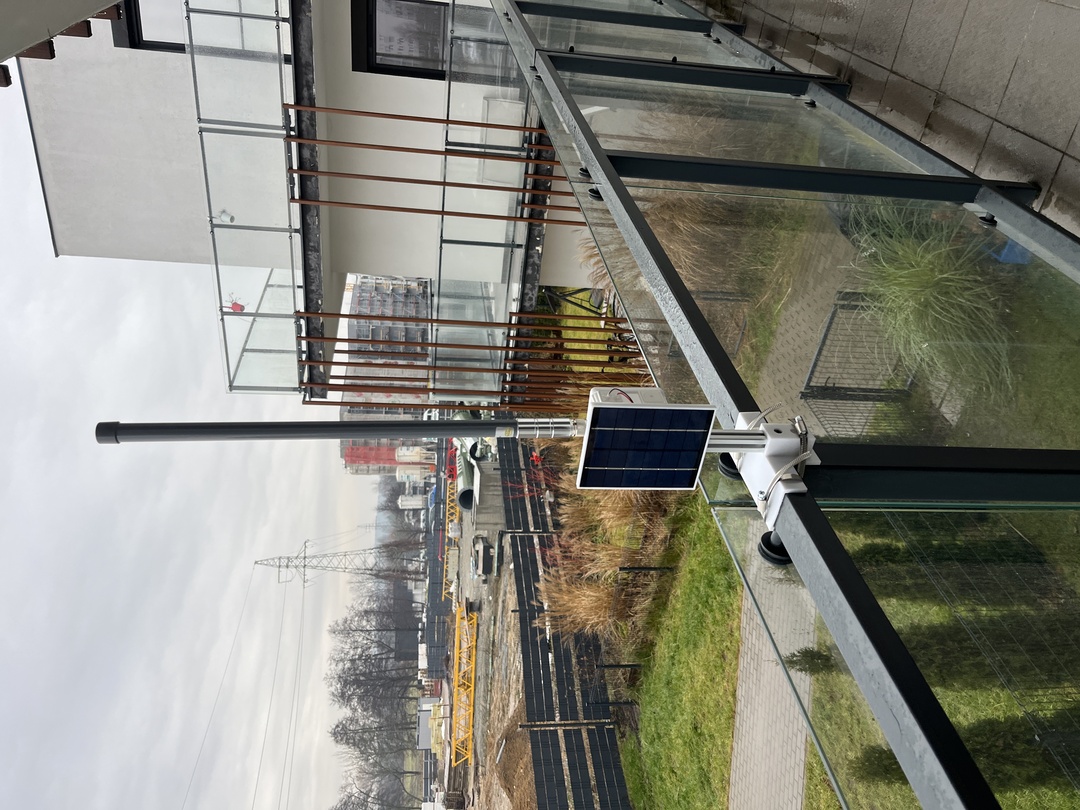
Outdoor Setup and Power Supply: To ensure sustainability and independence from grid power, I opted for a solar-powered setup. A 2W solar panel (110mm x 136mm) paired with a charge controller and an 18650 battery was my initial choice. However, this proved insufficient due to overnight draining, leading me to switch to a higher capacity battery.
-
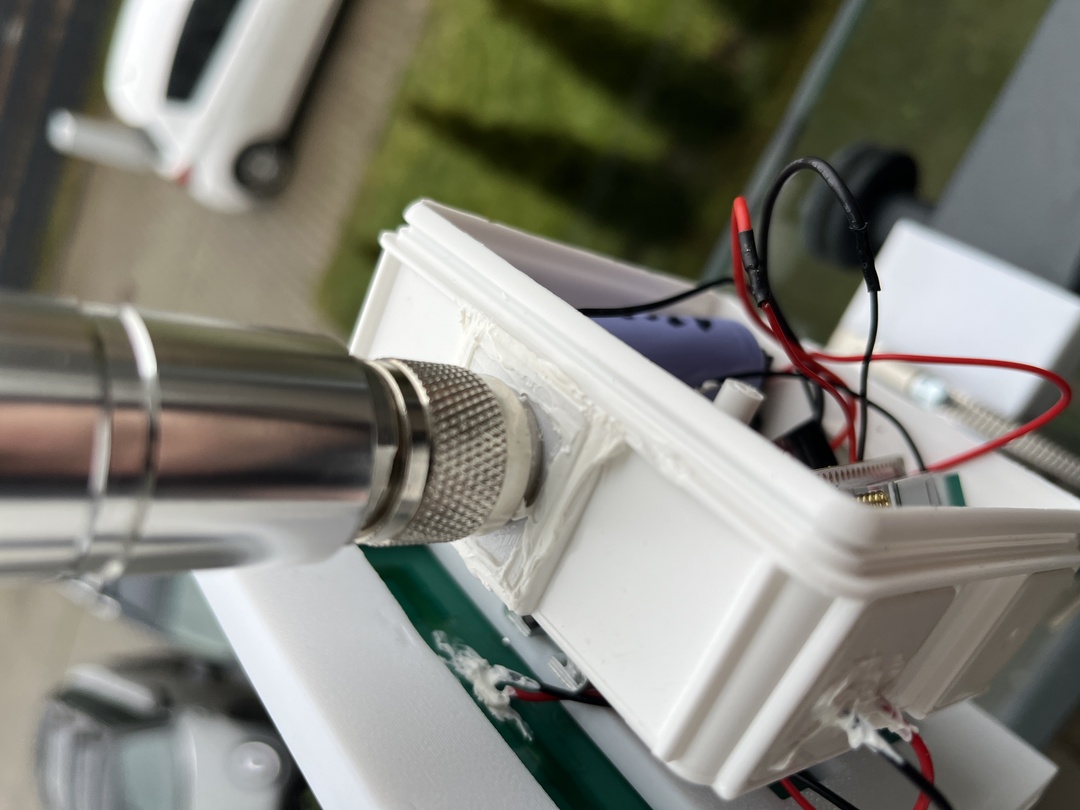
Antenna Selection: For reliable communication, I selected the Qoltec 8dBi external antenna, known for its performance in similar projects. Its range capabilities and durability in outdoor conditions made it an excellent choice.
Setup Details
The masternode is mounted on my balcony using a custom-designed aluminum profile (20x20 V-slot) and a 3D printed bracket. This setup ensures stability against wind while maintaining a compact size. The components are housed in protective enclosures to shield them from weather elements, ensuring longevity and functionality.
Testing and Challenges
My initial testing phase began at night, aiming to assess the system’s performance without solar charging. Unfortunately, the 1700mAh battery drained significantly overnight, highlighting the need for a more efficient power solution. Switching to a 2400mAh battery with lower internal resistance helped mitigate this issue but didn’t fully resolve it.
Improvements and Next Steps
Recognizing that the solar panel couldn’t sufficiently recharge the battery during the day, I decided to add another panel to enhance energy capture. This step is crucial for ensuring consistent operation and sustainability of the masternode.
Conclusion
This project has been a rewarding experience, blending technical exploration with practical application. It underscored the importance of thorough planning and adaptability when encountering unforeseen challenges. For anyone inspired by this journey, I encourage you to explore LoRaWAN technology—it’s a fascinating domain offering endless possibilities for innovative projects.
In closing, my masternode now stands as a testament to persistence and learning, ready to support future IoT endeavors with reliable, independent communication capabilities.
Images